The Unending Quest for Perfection

or How to Fine Tune Your Manuscript by Getting Rid of Overused Words

By CC Coburn

Polished that manuscript until it shines? Ready to print that puppy and send it to your editor/agent or contest judge? Hold it right there!

You could be damaging your chances by overusing certain words and in some cases using words that simply aren’t necessary.

Harlequin Executive Editor Paula Eykelhof says, “Most authors have their own overused words and phrases, and they can vary from book to book.” She also says that no matter how perfect or effective a word, overuse undermines the effect you’re hoping for.

“About” seems to be my most overused word; in fact, I found over 130 “abouts” in my manuscript for Colorado Christmas (Harlequin American Romance , November, 09). By using the EDIT/Find function in Word, I managed to delete “about” 98% of them! 🙂

You, too, can fine-tune your manuscript by utilizing your EDIT/Find function and either deleting the overused word entirely or replacing it with something more suitable. How do you determine what your overused words are? By reading the manuscript critically, looking for your “default” words and expressions, by paying attention to the ones your editor points out, by checking lists like the one I’m going to share with you.

Here’s a list I keep by my computer for just this purpose. Unfortunately, I don’t know who the original author is but I thank the clever person who compiled it in the first place. With help from members of RWA’s email list, I’ve added some more overused words to The List.

  • about
  • actually
  • almost
  • almost like
  • already
  • appears
  • approximately
  • basically
  • close to
  • even
  • eventually
  • exactly
  • finally
  • had
  • had been
  • here
  • just
  • just then
  • kind of
  • nearly
  • now
  • practically
  • obviously
  • really
  • seems
  • simply
  • somehow
  • somewhat
  • somewhat like
  • sort of
  • suddenly
  • that
  • then
  • there
  • truly
  • utterly
  • was

Examine sentences in which these words occur, and you’ll discover how often they serve no real purpose. Other words— verbs—to watch out for include: grin, leap, shrug, nod, smile, sigh. (Also watch for overuse of constructions like gave a sigh, groan, smile, etc.)

According to Paula, you should be judicious in your use of dialogue tags. “If the only tag you use is “said,” the effect can be flattening. On the other hand, some writers go out of their way to avoid using said altogether and use other words instead—words like groan, sigh, suggest, announce, argue, to name only a few. In many cases you can delete some of the tags, as long as it’s clear who’s saying what. And keep in mind that the dialogue itself should be well enough written so you won’t have to resort to these too often.”

So, have you checked your manuscript using The List and found words you use again and again? Have you been able to delete them, or found more appropriate substitutes?

Organising your manuscript using Document Map

Please Note: This article first appeared in RWA’s official monthly newsletter, Hearts Talk, in November, 2008. Due to the passage of time, some information in the article may no longer be relevant. 

I think of my writing in two distinct categories – before Document Map and After Document Map. Before, I hated plotting because I couldn’t keep track of it all in my head – I shifted scenes, got confused about where scenes occurred in the book, didn’t escalate the romance soon enough or way too soon, and had things occurring in the story that hadn’t been foreshadowed. My head spins at the thought of organising my first published novel into a story that eventually flowed seamlessly.

So what is Document Map?

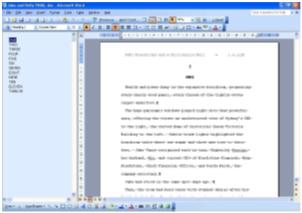
It’s an option in Microsoft Word that, when turned on, provides a separate screen on the left with a list of your headings. (right)

How does this help your writing?

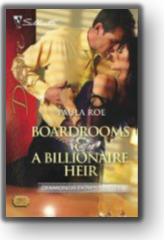
First, there’s no more having separate documents for each chapter. You can jump straight to your chapter or scene with one click on the left hand screen. But wait, there’s more. Instead of having “chapter one” as your heading, you can use DM as a mini-summary of your scenes. For example, the scene headings of my working draft for my second book, Boardrooms & A Billionair Heir (Silhouette Desire), went like this:

  • boardroom confrontation
  • first meeting
  • Holly’s POV / car discussion
  • at the Blackstone’s store
  • return to Sydney on plane
  • at lunch
  • Jake introspection
  • elevator scene / first kiss

And so on. This is a great way to see if you’re escalating the romance at the proper pace, if you have too much/too little of one character’s introspection and if you have enough scenes where your  hero/heroine are together. It’s also a neat way to see if you’re escalating the plot smoothly and foreshadowing important details. And as you click on those scene headings, you can quickly check if you have enough pages per chapter (my editor asks for no more than 20 pages per chapter, so with DM I can see at a glance if my scene break should actually be a chapter break instead.)

So, how do I get started?

First, you have to ensure your headings are classed as a “Heading 1” style so they will appear in this list. To do this, you simply

 highlight the heading in your ms (for e.g. ‘first meeting’), click on the drop-down arrow in your Style box and select “heading 1” (see left).

As you can see, Word has standard styles associated with these

headings, but they are fully customisable so if you don’t like the default settings (I never do!) you can change them. To do this, click the down arrow and scroll down to select “More…” at the bottom of the listing. A new box pops up (“Styles and Formatting” – see right).), roll your mouse over the style you want to change (in our case, Heading 1) then click on the down arrow key, select Modify then alter the settings: I make them standard with my ms – 12pt Courier New, double spaced, indent first line .5cm.

Now we’re ready to turn on Document Map

Which is as simple as View > Document Map (right). The Document Map command is also a toggle button (click once to turn on, click again to turn off), so by adding a button to my menu bar Document Map is only a click away from on to off (this is easy to add – right mouse click on your menu bar, then Customize > Commands, then choose “view” from the left hand side, click and hold on Document Map, then drag it onto your tool bar (left).

Document Map is free and built into MS Word, so it’s a brilliant little option that will save you heaps in stress and pin board space. And while there isn’t a feature to print out these headings, a hardcopy is just a matter of doing a screen dump: simply click your Prt Scr button on the top right hand side of your keyboard. This takes a screen snapshot and copies it to your clipboard, which you can then paste into a document and print it out from there.

When Paula isn’t using Document Map to plot her stories, she’s either designing websites, blogging at www.desirabelles.wordpress.com or writing. Get more details (and heaps of articles!) on her website at   www.paularoe.com

  • Subscribe by email

  • Subscribe by Feeder

  • Recent News

  • Blog Posts by Category

  • Archives

  • Our Team

    Blogmistress: Imelda Evans

    Blog Editor: Juanita Kees

    A Day in the Writing Life of... Keziah Hill

    Author Spotlights: Sarah Belle

    Cruisin' the Blogs: Juanita Kees

    New Releases: Laura Boon

    Blog Bites: Thea George

    Hearts Talk Wrap: Ainslie Paton

    Cover Contest: Eleni Konstantine

  • Your say:

    What We’re Rea… on Ruby Finalists!
    Derricksow on February New Releases
    Maggi Andersen on Craft: Types of Writers
    Eewang on BLOG BITE with Paula Roe
    Consultoria Seo on February New Releases
  • RWAus Tweets

  • Pages